- IT advies op maat!
- +31 6 24403578
- info@beketconsultancy.nl
Security Assertion Markup Language (SAML) and Microsoft Azure

The other day i received a question of setting up a Single Sign-On (SSO) solution for one of their corporate business (web-)application. SSO has been around for a while and the way to implement it, as far as i remember, is in combination with Active Directory Federation Services (ADFS). So, what if you have no on-premise infrastructure but only a Microsoft Azure environment available without ADFS? Luckily Microsoft has built in a (nice) feature for this within Azure.
As this is not something you have to implement on daily base i thought it would be a nice topic to write something about and share with you guys. Maybe this will be helpful for some of you.
What is SAML?
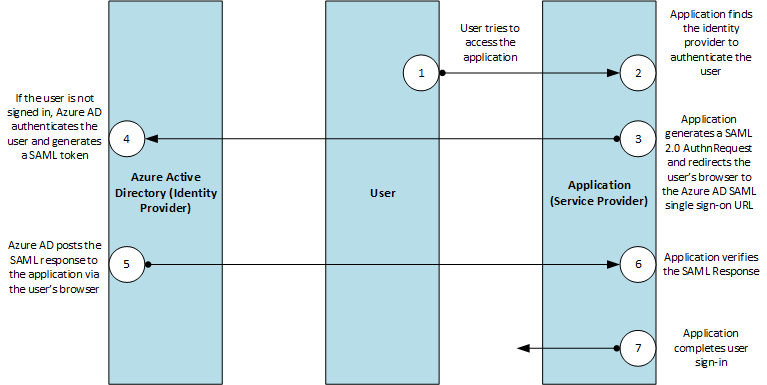
SAML stands for Security Assertion Markup Language and is a XML-based framework that is being used for the exchange of authentication and authorization between two security domains.
Source:
https://docs.microsoft.com/en-us/azure/active-directory/develop/active-directory-single-sign-on-protocol-reference
Azure Active Directory (AAD) and Enterprise Applications
Azure Active Directory (AAD) enables you to, besides managing and maintaining all your user accounts, manage your (Enterprise) Applications.
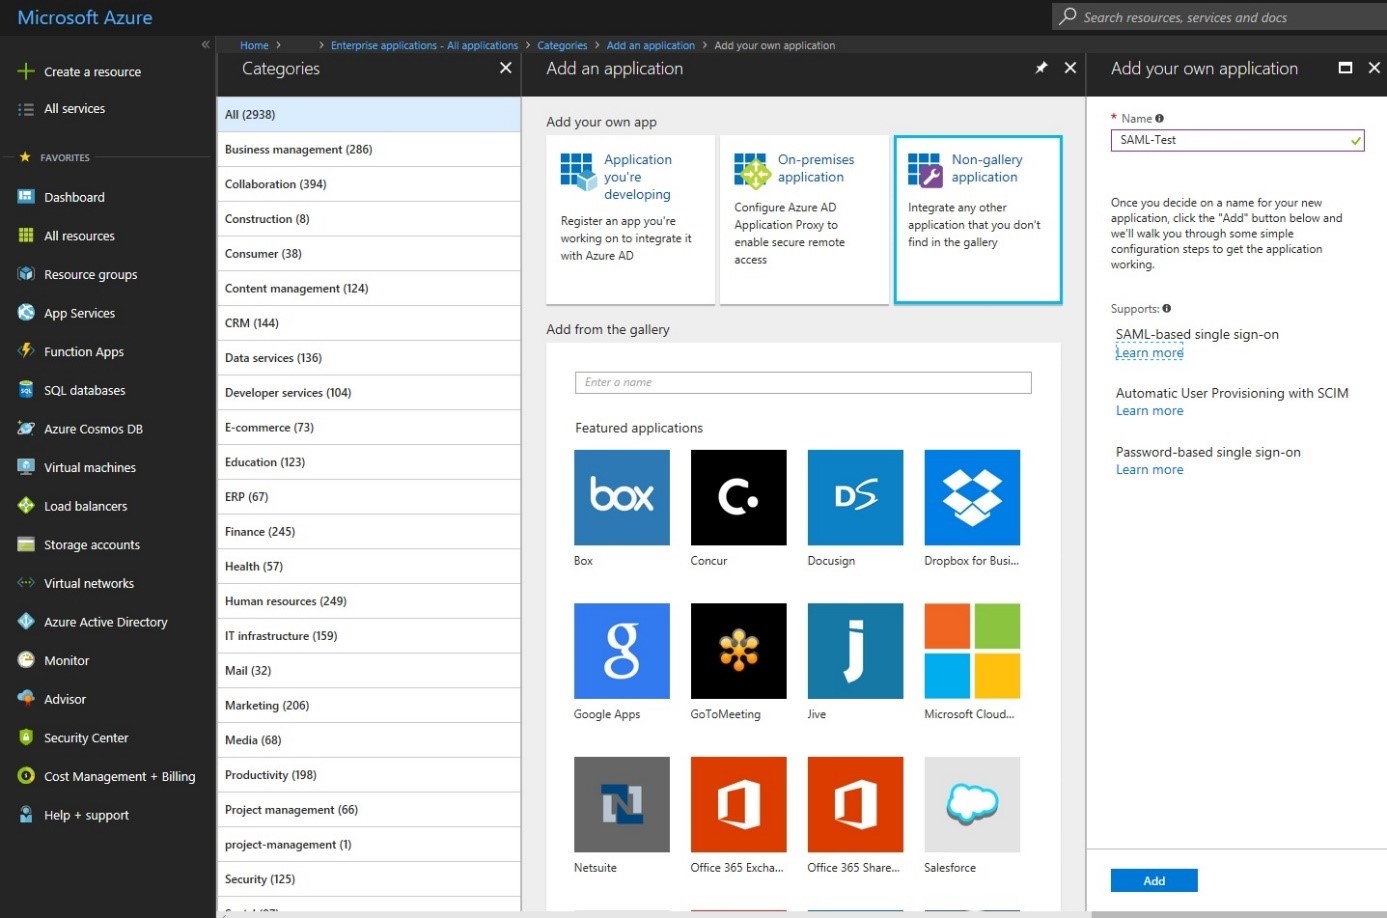
Default you’ll find a few Applications but for this purpose we’ll create a new one, named SAML-Test.
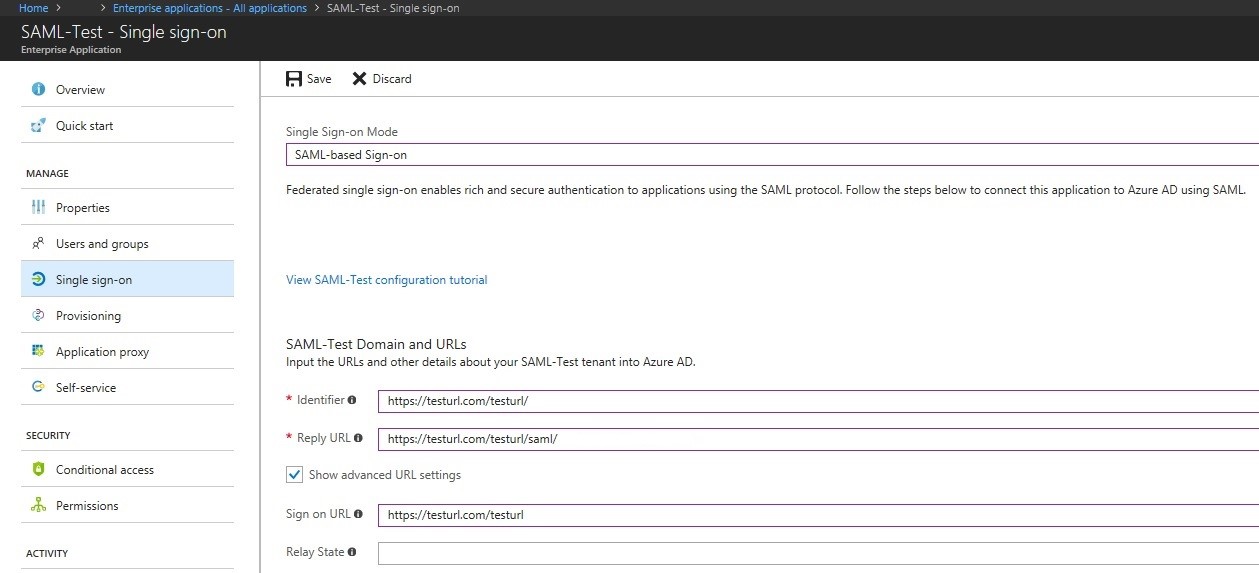
So, after you’ve created SAML-Test go to the Single sign-on tab and change the Single Sign-on Mode to SAML-based Sign-on.
Fill in the three required fields (Identifier, Reply URL and Sign on URL). You’ll probably receive a xml-file, from the organization that hosts the (web-)application, where this information is mentioned in.
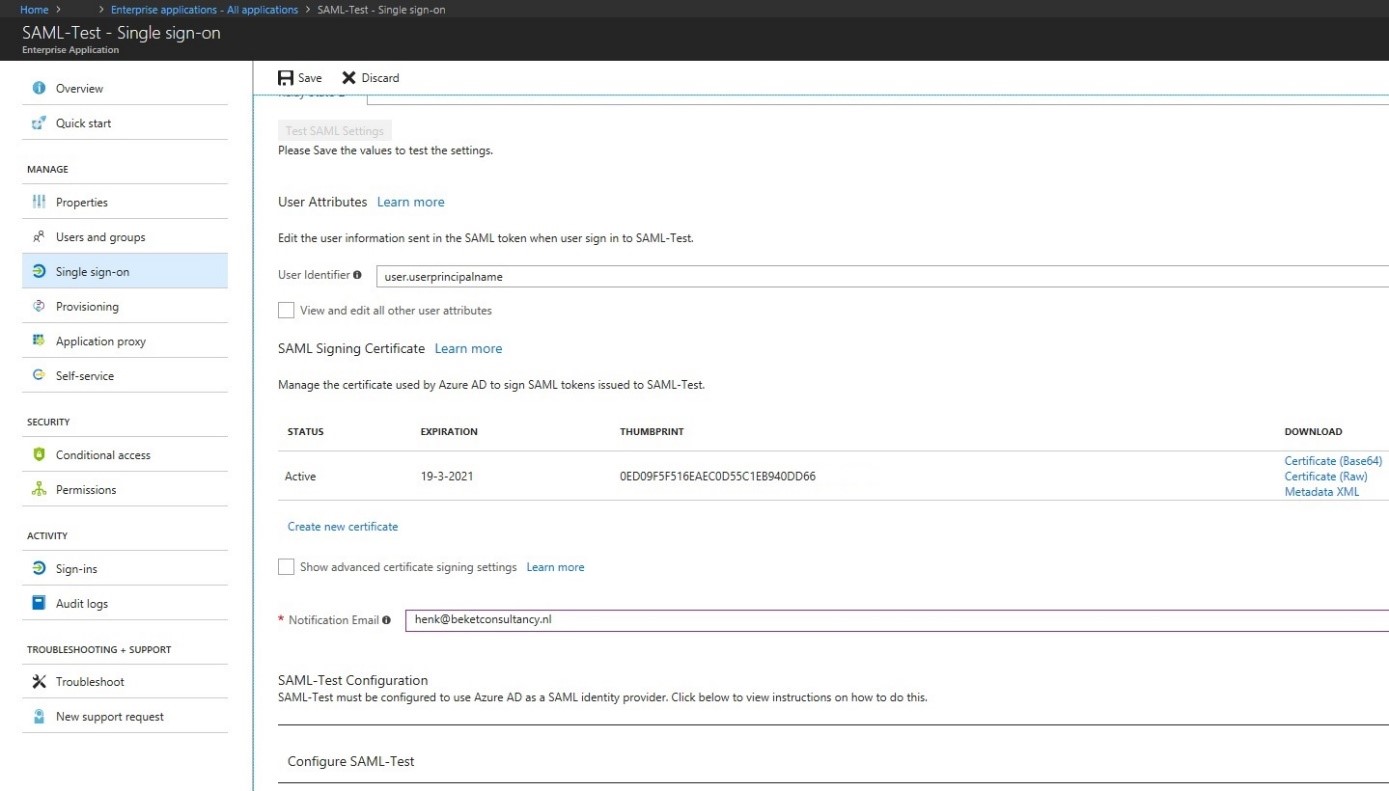
If you wish to change the User Identifier you can do so from the dropdown box. Make sure your user accounts have filled the appropriate attribute fields within AAD. Fill in the rest of the page, download the XML-file and click on Save. Make sure you send the XML-file over to the other organization.
Make sure you add an User and/or Group to the Application and you’re ready to go. That’s it! Easy isn’t?
Please feel free to contact me if you have any questions or comments on this post. Until next time!
Henk


